Saturday, December 22, 2012

Fluffy American Pancakes

Sorry, I am postponing to write this post for a few days now... I made a promise and didn't kept it... Time...time... Is running away and I feel sometimes I can't get enough of it...
Anyway, here it is, the recipe for fluffy american pancakes to make your week-end mornings a bliss ;)


What you need: 

- 135 gr flour ( I used black flour, but if you want white pancakes, use the white one)
- 1 tsp baking powder
- 1/2 tsp salt
- 2 tblsp sugar
- 130 ml milk, full fat please! :D
- 1 large egg, lightly beaten
- 2 tblsp melted butter ( cooled slightly) or olive oil, plus extra for cooking

How to make it:

1. Sift the flour, salt, baking powder and sugar in a large bowl. In a separate bowl or jug whisk lightly together the milk and egg, then whisk in the melted butter. 
2. Pour the milk mixture into the flour mixture ad, using a fork, beat in until you have a smooth batter. Any lumps will disappear. Let the batter stand for a few minutes. 
3. Heat a non-stick pan over a medium heat fire and add a knob of butter.  When is melted add a small ladle of batter. t will seem very thick, but this is how it should be. Wait until the top of the pancake begins to bubble and then turn the pancake over and cook until both sides are golden and the pancake has risen to about 1 cm thick. 
4. Repeat until you finish the batter. You can keep the pancakes warm in a low oven, but they taste the best when they are fresh directly from the pan. 
5. Serve with maple syrup, honey or jam...chocolate or whipping cream, fruits, ice cream etc, etc.... endless possibilities ;) 

Thursday, December 13, 2012

Pesche Dolci ( Pesche con Crema)


This gorgeous little creations will wow your friends and make you feel like you are the best baker ever :)...And nobody will guess how easy they are to make! Ok, unless they read it on my blog ... hahaha.. :D


The recipe will give you about 24 halves of peach, which means 12 full peaches.

What you need: 

For the Pastry Cream:

- 2 cups whole milk
- 1 vanilla bean ( you can use instead the zest of a lemon, cut into a long strip)
- 4 large egg yolks
- 3/4 cup sugar
- 1/4 cup flour

For the Dough:

- 3 3/4 cups all purpose flour
- 1 tblsp baking powder
- 3 large egss
- 3/4 cup sugar
- 3/4 cup full fat milk
- 1/2 cup butter, melted and cooled
- grated zest of one lemon

For Assembling the Peaches:

- 1/2 cup light rum or 6 tblsp Italian maraschino liqueur
- 2 tblsp peach shnapps
- red and yellow food colouring
- 1 cup fine sugar, more if needed
- fresh leaves of clementines or peaches, if in season to decorate

How to make it: 

1. First make the pastry cream: In a large pan bring the milk to a boil together with the split vanilla bean ( take the seeds out and put them into the milk as well) or with the strip of the lemon zest. In the meanwhile, whisk the eggs and sugar together until thick and yellow. Add the flour and whisk until incorporated.

2. Take the vanilla pod out of the milk and slowly whisk the egg mixture into the milk. Put the pan back onto the fire and keep it on while mixing until it gets thick. Put the cream aside and let it cool to room temperature covered with a stretch film so it doesn't get a crust.

3. To make the dough: In a large bowl whisk together the flour and baking powder. In another bowl whisk the eggs and add the sugar and whisk until combined. Whisk in milk, melted butter and grated zest of lemon. Gradually add the flour mixture and mix with a fork until the dough becomes smooth and stiff. Let teh dough rest for about 5 minutes.

5. Preheat oven to 170 degrees Celsius and line two oven trays with baking paper and put aside.

6. Using a tablespoon take pieces of the dough and roll between your palms and put the balls on the prepared trays. They should be about the size of a walnut. Leave about 2 cm in between each ball. You should be careful that all balls are sort of uniform in size. Then, when you finished making balls out of the whole dough, flatten the balls slightly with your palm.

7. Transfer the trays to the oven and bake for about 15 minutes. It shouldn't brown on top.

8. Assembling the peaches: While the cookies are still warm, take a sharp knife and cut a circle on the bottom ( flat part) of the cookie. Use the tip of the knife to scrape out enough crumbs from inside the cookie to make a small hole.

9. Place rum or maraschino liqueur in a small bowl and add the peach shnapps. Add the red and yellow colouring according to your taste, but try it first on a peach. Don't make a too strong colour from the beggining.

10. Fill the holes of the cookies with the pastry cream and stick the halves together. Lay them on a tray, tucked into one another so they hold each other and they stay together. Be careful not to crack any of the cookies while filling them up.

11. With a pastry brush, brush the peaches with the coloured liqueur all over the sides. If the colour looks too pale, you can add more food colouring, but keep in mind that the colour will intensify slightly over time.

12. After you brush the peaches with the coloured liqueur, roll each peach in the fine sugar.

13. Transfer the peaches to an air-tight container and keep in the fridge over night. They taste better about two days after they are made ;)

14. When serving them, decorate them with a fresh clementine leaf or peach leaf to make them look real...

Enjoy the wows :D


Tuesday, December 11, 2012

Cream Cheese Pithivers

These are some lovely little pastries. They don't contain any meat, but, if you wish, you can add some crsipy pancetta cubes to the filling.
They are easy to make and yummy to eat and if you wish you can double or triple the recipe, prepare them until the very last step and wrap them in cling film and freeze them up to 3 months. When you feel like having some pithivers, just take them out of the freezer, brush them with beaten egg and bake them for about 40 minutes until golden brown.


What you need:

- 2 tblsp olive oil
- 1 small leek, finely sliced
- 1 small onion, finely chopped
- 200 gr frozen peas
- 140 gr carrots, cut into 1 cm chunks
- a small bunch of parsley or chives
- 3 spring onions ( green), finely chopped
- 280 gr cream cheese
- 50 gr Gruyere cheese, grated
- 500 gr pack store bought puff pastry
- 1 egg, beaten
- green salad, to serve ( optional)

How to make it:

1. Heat the oil in a pan, add the leek and onions and cook over medium heat for about 10 minutes. Add the peas and carrots and cook until tender, about another 10 minutes. Spoon the mixture in a bowl and leave to cool. Mix the parsley or chives , cream cheese and the grated Gruyere cheese and add salt and pepper to taste.

2. Heat oven to 180 degrees Celsius. Roll out the puff pastry as thinly as possible and then cut 4 x 15 cm circles and 4 x 16 cm circles. You may need to re-roll the pastry twice, but you should get 8 circles and some left overs.

3. Put the 15 cm circles on a baking tray covered with baking paper. Spoon 2 tblsp of the filling in the middle of the circle, leaving a margin of about 1 cm around the edge. Using a pastry brush, paint the margins with some beaten egg and then lay the bigger circles on top and press to seal.

4. Brush the pithivers with the rest of the egg and bake for 20-30 minutes, until golden. Serve them with a crisp green salad.


Sunday, November 11, 2012

Mile High Apple Pie


This pie is maybe one of the best apple pies I ever tasted... It has this rustique look which makes you remember the days spent with the grandparents and the way it smells is simple heavenly...
A slice of this pie won't come out cut perfectly in your plate, the mile high apple tower may crumble, but believe me, the taste of it you will never forget... just pair it with a nice vanilla ice cream and your taste buds will be mile high for sure ;) I am posting this with one hand and with the other I am eating a slice of this pie... Oh, wow... Yes is good!!! :D


What you need:

For the deep-dish pate brisee dough:

  • 3 3/4 cups all purpose flour
  • 1 1/2 tsp salt
  • 1 1/2 tsp sugar
  • 1 1/2 cups ( 340 grams) chilled butter cut in cubes
  • 1/2 to 3/4 cup ice cold water
For the pie filling:
  • 1/2 cup all purpose flour
  • about 14 apples ( if you can use two or three types of apples, like Granny Smiths, Empire etc would make the flavors richer)
  • juice of 2 lemons
  • 1 cup sugar and a little bit more for sprinkling the pie crust before baking
  • 2 tsp cinnamon
  • 3 tblsp unsalted butter
  • 1 egg ( to put over the pie crust before baking)

How to make it:

 Making the dough: 
1. Preheat the over to 180 degrees Celsius. Start preparing the dough as follows: in a food processor mix the dough ingredients. First put the flour, salt and sugar and mix them in the processor. Then put the cubed butter  inside and process all until it resembles coarse meal. Don't over process!!! 
2. Slowly by slowly, with the food processor running, start adding 1/2 cup of the ice water until the dough starts holding together. Try it with your fingers. If the dough doesn't hold, add a little bit more ice water. 
3. Take the dough out on a stretch film and wrap it well and put it in the fridge. 

Making the pie filling: 

1. Peel and core the apples and slice them in about half a centimeter slices. Put the slices in a big bowl and sprinkle with the lemon juice to prevent discoloration. 
2. In a small bowl mix the flour, sugar and cinnamon and put all of them on the apple slices. Mix the apples with a silicone spoon to prevent braking the apple slices. 

Putting the pie together:

1. Take less than half of the dough you prepared and roll it out on a floured surface in a thin layer. Transfer it to your deep-dish pie pan and arrange it slowly so it doesn't break. It has to come up to the sides of the pan. Wrap the pan afterwards with stretch film and put it in the fridge together with the remaining dough ( which you will use to cover the mile high apple slices ). 
2. After a few minutes, about like 5 or 10, take the pie dish out of the fridge and pour into it the whole bowl of apple slices, stacking them in a high pile. 
3. Roll out the rest of the dough from the fridge on a floury surface. It has to be big enough to cover your apple slices pile. 
4. After you roll the dough, arrange it over the pile of apple slices and crimp it on the sides underneath the bottom dough. You should have a rustique looking pie, like a dome. 
5. With a paring knife, poke 3-4 holes at the top of the pie, to let the steam free from it while baking. 
6. Beat the egg with 2 tblsp of water and egg wash your pie with it and then sprinkle it with some sugar. Put the pie in the oven at 180 degrees for about 15 minutes, until the crust becomes golden and then decrease the temperature to 170 degrees Celsius and bake the pie for another 40-45 minutes. 
Let it cool for about 5 minutes ( if you have the patience ;) ) and then cut a huuuuuge slice of it, top it with vanilla icecream and devour it.... with your family and friends...or alone if you don't like sharing :D... 

Monday, November 5, 2012

The success of the zuchinni and flax seeds muffins

Here is the living proof that the zuchinni and flax seed muffins that i baked last night are according to Tulia's taste :) ..

Sunday, November 4, 2012

Zuchinni and Flax seed Muffins


Ok, I decided to give it one more try and restart blogging... Ha, ha.. Hope it lasts this time.. When I started this blog, I didn't realized how much time a new baby can take from you... I thought that little Tulia will sleep like in her firsts months all the time :D. The joke was on me... :)))


Anyway, this week was the zuchinni week at our house... Pickled zuchinni made by our nanny, zuchinni fritters made by me for Tulia's lunch ( will post the recipe for this soon too), zuchinni muffins and so on ..


Actually, I realized that Tulia is not a big fan of veggies, so I have to come up with ways to incorporate them in her daily menu, without her noticing.  Today I tried to feed her a creamy broccoli soup at lunch time and you can only imagine the shouts I got back from her... The greeny soupy stuff in the plate didn't appeal to her AT ALL... :)... 


So, tonight I made for her these zuchinni and flax seed muffins to trick her into eating more veggies and fibers... Try them....They are healthy and tasty too... 


What you need: 


  • 1 3/4 cups whole wheat  flour 
  • 1/2 cup ground flaxseed
  • 1 cup lightly packed light-brown sugar
  • 2 teaspoons baking soda
  • 1 teaspoon baking powder
  • 1/2 teaspoon coarse salt
  • 1 teaspoon ground cinnamon
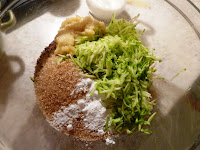
  • 1 1/2 cups coarsely grated zucchini (from 1 large zucchini)
  • 1/3 cup mashed ripe banana (from 1 large banana)
  • 3/4 cup whole milk
  • 1 large egg, lightly beaten
  • 1 teaspoon pure vanilla extract

How to make it: 

  1. Preheat oven to 170 degrees Celsius. Put the muffin papers in your baking tray. In a large bowl, whisk together flour, flaxseed, brown sugar, baking soda, baking powder, salt, and cinnamon. Add zucchini and banana and stir to combine. In a small bowl, whisk together milk, egg, and vanilla. Add milk mixture to flour mixture and stir until combined (do not overmix).


  2. Divide batter among muffin cups. Bake until a toothpick inserted in center comes out clean, 20 to 25 minutes. Let muffins cool completely in pan on a wire rack, about 30 minutes.


Tuesday, April 24, 2012

Pear and Soy Milk Smoothie ( extra fibers)

Pears have up to 6 grams of fiber and the pectin they contain lowers the bad cholesterol. They also contain vitamin C and cooper which helps in the formation of red blood cells.

What you need ( for 1 person):

- 1 pear, cored and coarsely chopped
- 125 ml soy or rice milk ( I found a bio combination of both, and what is better is that is unswetened)
- 5-6 ice cubes
- 1 tablespoon honey (optional)

How to make it:

Combine all ingredients in a blender; blend until smooth.

Rucola and Goat Cheese Salad with Strawberries and Walnuts

This is such an easy salad to make and it makes you feel so good while eating it...


What you need:

- olive oil
-wine vinegar
- mustard ( Dijon or full grain)
- honey
- 4-5 strawberries
- goat cheese
- walnuts
- rucola salad


How to make it:


1. In a small bowl mix 4 tablespoons olive oil with 1 tablespoon wine vinegar, 1 teaspoon honey and 1 teaspoon mustard. Put aside.

2. On serving plate arrange the rucola and top with sliced strawberries, crumbled goat cheese ( quantity is to your taste really) and some wallnut pieces.

3. Drizzle on top the dressing prepared earlier.

Simply healthy and good ... Enjoy ;)

Saturday, April 21, 2012

Kiwi Smoothie ( immunity boosting)

So, the journey through healthy smoothies continues today with a vitamins filled kiwi smoothie... Kiwi has more vitamin C than an orange and has huge amount of lutein and vitamin E. The skin of the kiwi fruit is actually edible and you can leave it on the fruit for extra fiber...

What you need ( for 2 people):

- 4 kiwi fruits, peeled and cut in pieces
- 125 ml freshly squezed orange juice
- 1 tablespoon seabuckthorn ( or agave) nectar
- 200 gr ice

How to make it:

1. Combine all ingredients in a blender; blend until smooth.

Get your energy and have fun ;)

Friday, April 20, 2012

Blueberry and Flax Seeds Smoothie (immunity boosting)

As I promised, I started today a nice and healthy detox and immunity boosting diet... Had to... I felt that my body is slow, tired and needs a kick of good healthy energy.
So, every day you will be able to see my journey between healthy and also tasty smoothies....
I start with a blueberry and flax seed (romanian: seminte de in) smoothie... So tasty, guilt free and takes just a few minutes to make...No excuse not to...

What you need ( for two people):


- 120 gr frozen blueberries (I froze mine last summer...I love to buy fresh fruits and freeze them to have a healthy stock during winter But you can find frozen ones at the supermarket too.)
- 1 banana
- 170 ml low-fat plain yogurt
- 1 filled tablespoon of flax seeds
- 1 tablespoon of honey


How to make it:

1. Combine all ingredients in a blender. Blend until smooth.

And now, let me give you some scientific info about berries and flax seeds: berries are boosting with anti-inflammatory and disease-preventing antioxidant. They contain very little calories ( less than 100 calories in 250 grams).
Flax seeds are maybe one of the rare plant sources of Omega 3. They contain fiber and phytoestrogens, which fights cancer.


Friday, April 13, 2012

Easter Egg Garland

I guess that every one of us blew out eggs sometimes in their childhood... This project will remind you of those times and the result will be a sweet Easter garland to decorate a sweet mirror or the mantle of a fireplace... Or, make it very long and decorate your interior stairs for a really fun Easter atmosphere...


What you need:

- fresh eggs ( the number is yours to chose)
- a needle
- egg paint
- decorative ribbon

How to make it:


1. First you have to blow out the eggs. Make two small holes at each end of your eggs with the needle ( it takes a little practice to be able to make the first few holes, but after that things will go easier).  Each hole should be at least 3-4 mm wide so you can blow the content out. Preferably make one hole bigger so that you wont need to blow into the egg until you turn blue. Anyway you will need your holes to be slightly bigger so you will be able to insert the ribbon.

2. Wash your empty egg shells and let them dry overnight, then paint them with your Easter egg paint, just like you would paint a normal egg.

3. After you painted your egg shells, you can start the fun part. Start by inserting the ribbon into one hole of an egg shell and push it until you see it getting closer to the hole at the other end and then pull it out with the help of a crochet needle or a toothpick. Make a knot on the ribbon after the egg and continue with the other egg shells in the same way until you reach the length you wish for your garland.


This is it! Enjoy this simple and sweet project :)! Look who enjoys my garland today :)


Neon Easter Eggs with a Romantic Touch

These eggs are very easy to make.. All you need is the special neon colour for eggs that you can buy at almost any store these days, some pieces of lace, buttons, little bows and beads that you can find at craft stores and a hot glue gun...
And there you have it! A special touch for an eggstraordinary Easter!!! :)
Have fun trying this... ;)

Thursday, April 12, 2012

Simple-to-make Easter Table Centerpiece

Yes, I am back... Not completely myself yet... I am fighting a tooth problem for the last two weeks... Antibiotics, pain, inflamated cheek... All the "great" things that can happen when a tooth is involved... Seems to be getting better, but it definetely drained all my forces out...
Anyhow, since Easter is coming, I have to somehow come back to my senses... Soooo, I fight the tooth back and start by making an extremely easy Easter table centerpiece... No fuss, no work... Buy it all and arrange it nicely on your table... And a cake stand is just perfect to display it....
Have fun getting ready for Easter and see you soon;) Don't eat those chocolate bunnies before Easter day!! :D

Wednesday, March 28, 2012

Parisian Tuna Sandwich

Oh, I was sooooo tired of always getting the same old tuna salad every time I was ordering one in the restaurant: corn, some tuna, some onions and here you go... Take it or leave it...
I wanted something more....oh la la.... So, here it is... Parisian Tuna Sandwich... :)

What you need ( for 3 people):

- one fresh black bread ( if you prefer white bread, you can use that too) - I found this wonderful black bread with seeds at KomsuFirin in Istanbul... Is soooo yummy!!!
- 2 medium cans of tuna fish ( I used fish in water, not in olive oil...more light :P )
- 3 eggs
- 1 avocado
- half of an onion cut thinly
- arugula salad
- 3 medium sized tomatoes
- 3 spring onions
- 3 small cucumbers
- olive oil
- red wine vinegar
- 1 teaspoon whole grain mustard


How to make it:


1. In a medium bowl pour 1/2 cup of olive oil and 1/4 cup of red wine vinegar. Add the thinly cut onion, salt and pepper, give it a mix and put it aside for 10 minutes.
2. In the meanwhile boil your eggs and cut your bread in slanted slices. After 10 minutes add to the onions the drained tuna cans, the spring onions cut in pieces, the radishes, cut as well,  and the whole grain mustard. Separately cut the tomatoes in slices. Do the same for the avocado, the eggs, the cucumbers.

3. Put a slice of bread on your serving plate. Pour on it a little of the sauce from the tuna mix. Then put on top of it a few leaves of arugula, then top it with tomatoes, egg slices, the tuna mix from your bowl and the avocado slices ( just arrange it a little.. it should look a little messy...This is the fun in it anyway... The bohemian Parisian look ) and then top everything with another slice of bread sprinkled with the tuna sauce. Serve it with a small spinach salad for a healthy addition...


Enjoy a healthy lunch or dinner and feel like a french ;)

Monday, March 26, 2012

Pasta with Sun Dried Tomatoes and Wilted Mache

First of all sorry again for the extensive break... Some personal issued to handle... BUT now I am done and I am in Istanbul!!!! I SIMPLY LOVE THIS CITY!!!
I am not in my house, so it takes a few days to get into line and start posting daily on the blog :)...
So, for tonight I thought of something easy to make, tasty and still a little healthy ( OK, OK...not fully healthy!!! ;D )...


What you need ( for one person):

- 200-300 gr pasta of your choice
- 4-5 pieces of sun dried tomatoes
- 4-5 garlic cloves
- 30-40 gr parmigiano, grated
- olive oil
- 20 gr butter (optional- for the less healthy version)
- salt and pepper to taste
- mache salad ( it tastes earthly and is very healthy), but you can use rocca for example as well.

How to make it:

1. Put your pasta to boil in  salted water. While the pasta is boiling, cut the sun dried tomatoes in thin strips and put them aside. Grate some of your parmigiano and put it aside also.


2. Put a pan on fire to heat and put some olive oil and, if you wish, the butter to melt. When is hot, add the cut sun dried tomatoes and the crushed garlic to the pan and give them a toss for 2-3 minutes until they become fragrant ( you can put the garlic in the garlic press directly, without peeling it...The press will do its job ;) )

3. When the pasta is cooked, drain it, but reserve one cup of the water in which it boiled. Add the drained pasta to the pan with the sun dried tomatoes and the garlic and toss them. Add the grated parmigiano, salt and pepper to taste and a part of the reserved water in which the pasta boiled ( don't add it all. You will add more if you think that the pasta gets too dry).


4. Add the leaves of the mache and stir. The mache salad will get a little wilted, so you should add it just before taking the pasta off fire. If you like you can add more grated parmigiano.
5. Serve the pasta very hot with a nice glass of wine.. :)